Tampilkan postingan dengan label bottom. Tampilkan semua postingan

Plywood Boat Plans | Didi 950 Projects

| 0 komentar |

Plywood Boat Plans


There appears to be considerable interest in my posts about the boats being built to our Didi 950 design. This is a radius chine plywood design with hard chine in the topsides, designed to fit into the Classe 950 box rule. In the past few days I have received a bunch of new photos that show the build process clearly, as well as some updated progress photos.

Before going into the new photos, you might like to read the article that I posted today on my Boatbuilder Tips for Amateurs blog about how to construct building stocks or beds, the foundation off which the skeleton of a wooden boat is built. It is illustrated with photos of the Didi 950 that is being built by Fred Grimminck in Australia. The photos below are mostly of that same project, being built from scratch without a kit.

The photo below shows the various backbone components, all of which slot eggcrate-fashion into the bulkheads. The slots help to locate the bulkheads and backbones correctly relative to each other. The bow and stern have single backbone on centreline and the mid-part of the hull as two backbones that run down each side of the keel support box. The two shorter pieces on the right are the paired double-backbone parts. Next toward the left is the aft backbone, which turns up at the far end to support the transom. Extreme left is the bow backbone, which turns up at the far end to form the stem and supports a bow bulkhead into which the forward ends of the stringers are located.
Didi 950 backbone components. Click on all photos to enlarge.
The photos below show a few of the forward bulkheads with the bow backbone dry-fitted in place. The backbone has doublers just below deck level for through-bolting the bow chainplate. The doublers can be seen at the forward lower end of the backbone.
Didi 950 bow backbone and forward bulkheads
Didi 950 bulkheads and backbones
In this next photo, the transom doubler has been set up as a doubler and the stringers etc run through, then are trimmed flush. When the transom is glued over the doubler the end-grain of the longitudinals will be covered and protected. Look through the 4th cutout from left through the doubler to see how the aft end of the aft backbone turns up against the inside face of the doubler. The backbone has locating tabs that slot through the doubler, seen as light-coloured marks on centreline of the doubler. In the lower photo the transom is being glued over the outside of the doubler.
Didi 950 transom doubler
Didi 950 transom being glued over doubler.
The sheer clamps on this design sit diagonally across the corner at the intersection between hull sides and decks. They are screwed and glued to cleats on the faces of all bulkheads. In this photo the sheer clamp is clamped to those cleats. You can also see how the stringers are slotted through the bulkheads. Once the hull skin has been glued on, these junctions become very strong and rigid
Didi 950 sheer clamp
Looking forward along the hull just prior to fitting the bottom skin. The wide stringers on both sides are the tangent stringers, with doublers to back up the joint between flat bottom panels and radius skin panels at the turn of the bilge.  The single aft backbone can be seen running through to the 3rd bulkhead from the bottom of the photo. The double backbone runs forward from the 2nd bulkhead from the bottom of the photo, then changes back to a single backbone further forward, also visible.
Didi 950 bottom stringers and backbones
Stringers in the forward part of the hull, mainly showing the radius area. The two broad stringers are at the tangents, joining the flat and radiused skins together. Between them are three radius stringers, over which the double-skin radius will be formed. Below the lower of the two tangent stringers are the stringers for the side skin panels.
Didi 950 stringers
This last photo shows Mike Vermeeschs boat, being built from a kit in Ohio. Mike has the side panels all dry-fitted to check for fit ahead of gluing in place. Looks like a nice fit. The bow will be capped with solid wood, which will cover and protect the end-grain of the stringers.
Didi 950 hull side panels
Thank you to both Fred Grimminck and Mike Vermeersch for taking the trouble to send me these photos and allowing their use.

To see our other designs, please visit http://dixdesign.com/ .

Do you find information about Plywood Boat Plans are you looking for? If not, below may help you find more information about the Plywood Boat Plans. Thank you for visiting, have a great day.
Read More..

Boat Trailer Plans Australia | Bottom paint

| 0 komentar |

Boat Trailer Plans Australia


The below the water line part of the boat is painted with the barrier coat. The boat can now be removed from the building cradle.

Having purchased the metal for the boat wheel abraded and primed, getting her bottom ready for the barrier coat was not to bad of a job. There is not much good anyone can say about sand blasting, but as far as sand blasting a boat this size, this job could have been worse. While grinding metal may make the metal look like it is in an ideal surface for paint, the profile created by sand blasting is the gold standard for a mechanical bond of paint to metal. Because the metal had already been blasted, my focus on preparing the hull was to blast to white metal the welds and weld zone, all the print through from the interior frames and longitudinal stringers and the grinder marks. All the rest of the metal was blasted to "scuff" the existing primer to give the barrier coat paint a profile to stick to.

I had talked to a commercial blaster about doing this job, and while his price was reasonable, I felt as if I had  decent enough equipment to do the job. The air compressor in the barn is a single phase 10 hp with an 80 gallon tank. Because the mill scale had already been removed, and I was not taking all the hull to white metal, the barn air compressor could handle the job. Before starting blasting, I cleaned the shop and gave the floor a good sweeping with a back pack blower. The blasting pot I used only holds 100 lbs, so after the pot was emptied, the sand was swept up off of the shop floor, poured through a screen and re used. After three screenings, the sand was thrown away. The weather was about as perfect as one could fine to sand blast with 70 degree temperatures, high pressure, and darn near zero humidity. Blasting was started late in the afternoon and finished the next morning. About eight hours was all it took to do the job.


Because the blasting was done inside during picture perfect weather, blooming of rust was not an issue. Before starting the first coat of paint, the floor was swept again and the hull blown off with compressed air. The paint I decided to use is a PPG product called Amerlock and is a two part paint. My paint rep has been selling it to the operators of push boats and tugs, and thats what theyre using below the water line. Because the paint is so thick, I decided to roll it on vs using reducer and trying to spray it. I did reduce the paint 5 % by volume which gave it a better consistency and seemed to help roll it on. As long as I did not allow more than 24 hours between coats, a chemical bond between coats would occur and no scuffing was needed. Three days gave me three coats. Once the boat is off of the cradles, Ill blast where the cradle was, scuff the rest of barrier coat and apply the anti foul.

Because this paint is designed for below the water line, and the rest of the primer on the boat is not for below the water line, I painted the barrier coat six inches above the water line. My plan is to bring the top coat green hull paint down on the barrier coat by two inches which will allow me to bring the anti foul bottom  paint four inches above the water line. The boot stripe should start at the six inch elevation which will hide the parting line created by the barrier coat. The boot stripe will not get painted until after launch once we are able to see just where the water line ends up.

Having the bottom painted allows one to better see how the boat will sit in the water. With this job finished and all the cut up fore and aft paint work completed, painting the hull green is now a reasonable job that should take only a few hours to  as Im only going to spray one side of the hull at a time. Scuffing, taping, and minor repairs should take a day , maybe a day and a half. The paint should be wrapped up by early June.

Cheers

Do you find information about Boat Trailer Plans Australia are you looking for? If not, below may help you find more information about the Boat Trailer Plans Australia. Thank you for visiting, have a great day.
Read More..

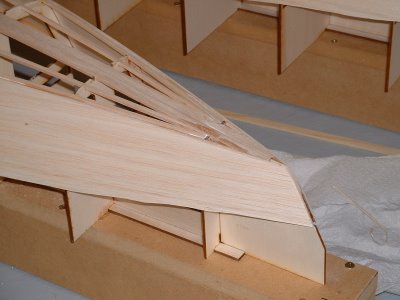
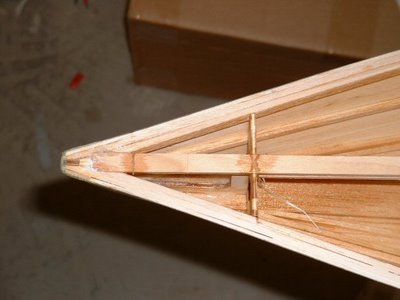
Canoe Boat Plans | Sailing Model AMYA Star45 Class bow details sides planked ready for bottom

| 0 komentar |

Canoe Boat Plans


Do you find information about Canoe Boat Plans are you looking for? If not, below may help you find more information about the Canoe Boat Plans. Thank you for visiting, have a great day.
Read More..

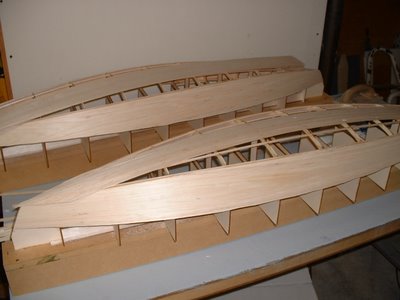
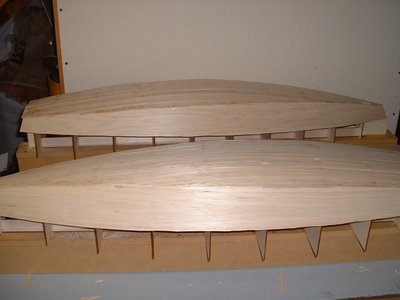
Kayak Boat Plans | Sailing Model AMYA Star45 Class Planking bottom of hull

| 0 komentar |

Kayak Boat Plans


From John Fisher:

Photograph by John Fisher


Photograph by John Fisher


Since it was requested here are a couple of photos of planking the
bottom of my two wood/glass stars. photo 01 is the bottom of the first
star about half way done. Planks are 1/16 X 3/8 balsa. These were cut
from a 48" long sheet. Weigh your balsa before buying it. I would not
use a 3 X 48 sheet that weighed in at more than 22g. It takes 3 sheets
to cover the bottom and you could add another 1 to 1.5 oz by using
heavy balsa.

I started in the middle and worked to the outside. I sprayed the
shadows with kicker, then put down a plank, then added super fast CA to
hold it down. If the kicker was not dry enough it would cure before it
wicked into the joint which would cause the next plank to not fit
correctly. I had some variation in the planks, but once they were
glassed the bottom smoothed out quite a bit.

If I were to do another one I would add the half frames. I will be
adding them to the DXF files in the next couple of days for anyone
wishing to cut a set.

Picture shows the bottom after it was completely planked. On the
second boat I got a nice pattern on the bottom since the balsa sheets
had different grain structure. I sanded the sided flush and got the
bottom relatively smooth, but not perfect. With the balsa planks they
were flexible and if sanded too much you get thin spots at the frames.
The glass smoothed out inperfections. If doing a hard wood bottom the
planks should fit better than what I did with the balsa.

John Fisher 2006 August 15


Do you find information about Kayak Boat Plans are you looking for? If not, below may help you find more information about the Kayak Boat Plans. Thank you for visiting, have a great day.
Read More..

Yacht Boat Plans | Didi 950 Build Bottom Skin Panels

| 0 komentar |

Yacht Boat Plans


Mike Vermeerschs amateur boatbuilding project of a Didi 950 is moving on to the next stage, with bottom panels fitted and work starting on the side panels. Mike is building from a plywood kit that we supplied to him and reports that the fit is good. The kit has jigsaw joints on all large panels, making them easy to assemble either on the floor or on the boat.
Didi 950 with all stringers installed.
Two of the stringers each side, at the junctions between flat and radiused skin areas, have plywood doublers attached to serve as backing pads to the joint. I call these the tangent stringers. The doubler on the upper tangent stringer is in process of being fitted and can be seen running forward from the transom through to the third bulkhead from aft.

In the photo below, the transom has been fitted, followed by the bottom panels. These panels each have two transverse jigsaw joints and join each other at a centreline butt joint over the plywood backbone. In the photo the jigsaw joints have temporary battens over them to secure them while the glue is setting.
Bottom panels fitted.
Mike has also started to dry-fit the side panels ahead of gluing in place. At the right of the photo the forward lower panel can be seen and which will continue through to the transom. The lower edge, as seen upside-down like this, forms one half of the chine. The other half of the chine will be formed by the upper side panel.

Today Mikes 300lb brother decided to test the hull stiffness of this partially-built Didi 950 . He climbed onto the bottom of the boat and jumped on the bottom panels. They passed his improvised test but I think that I would have recommended that he wait until the whole hull was skinned before doing such a test.
Mikes 300lb brother tests the Didi 950 hull stiffness.
The broad stringer that shows on this photo is the upper tangent that will join the lower side panel to the radius.

To see our other designs, visit http://dixdesign.com/ .


Do you find information about Yacht Boat Plans are you looking for? If not, below may help you find more information about the Yacht Boat Plans. Thank you for visiting, have a great day.
Read More..

Boden Boat Plans Australia | Hull finish paint

| 0 komentar |

Boden Boat Plans Australia


Of course, in all things boat building, this job took about double the time I figure and posted about in my last blog post. The reason for the underestimated time was worthy of the extra time in my opinion.

When I had completed the body work on the hull, and sprayed the last coat of primer, I had thought I had the sanding to a good enough quality to paint. Thats kind of a loaded  response, as the primer was probably smooth enough to paint, I just wanted it a bit smoother. The problem I was fearing was that not having the primer perfectly flat would cause the top coat to have some blemish. Without more sanding, the top coat would still be shiny and pretty, but the blemish I was worried about would make it a problem to revive the finish years down the road with polishing and wax. The primer needed to be flatter. So given the lessons learned on the transom and wanting a more user friendly finish, I decided to re sand the hull.

Sanding the hull ( Im only talking about the port side today) to 320 grit was not to bad of a job. Its kind of hard to describe what Im talking about, but once you start to sand with 320, minute high spots in the primer start to appear. More sanding flattens the primer, and the high spots disappear. The primer starts to get a shine to it, and it is almost as if it is being burnished by the finer grit sand paper. 320 seems fine enough for a boat paint job, but Im sure body shops working on cars would take primer to at least 400 and more likely 600. There are for sure better ways to spend ones time than sanding primer so I approached in my not getting in a hurry way of doing things. Spending an hour  before leaving for work in the morning and a hour after work in the evening, helped me keep the patience  needed for this type of work.

Wanting to break up visual size of the hull, I decided to paint the rub rails another color. The lower rub rail extends around the back of the boat and becomes the swim platform. I dont know how many of you have painted the color red  in your house, but I can tell you that I now know that red industrial paint has the same problems as red house paint. You have to prime anything you intend to use red paint on. I had already painted the swim platform white, and the swim platform part of the rub rail green. I re sanded the swim platform rub rail, taped it off and began spraying red over the green. The green makes the red a few shades darker than the other ( primed) rub rail. The few spots on the swim platform rub rail  where I sanded through the green in to the white primer, the red does not cover the white. This part of the rub rail is going to  have to be sanded, primed, and re painted. Truthfully, it doesnt look that bad, but it is noticeable enough that I want to re do it.

Taping off the hull took also took quite a bit more time than I had figured. I probably have five or six hours invested in taping. Once I had an area taped, I wiped it down with a tack cloth to remove the dust. I started taping on Thursday night, and finished it Friday after work so I would be ready to spray Saturday morning.

When I blasted and painted the barrier coat on the hull bottom, I brought the barrier coat six inches above the water line. I brought the green two inches down past the barrier coat, so when the boat is in the water, about four inches of the bottom paint will be seen. The white barrier coat will be covered with red anti foul paint. 


The weather here has suddenly turned hot, and Saturdays forecast was for temperatures in the 90s. Figuring it would take four hours to spray the port side, I wanted to be spraying by 7:00 am and finished before the 90s found their way into the barn. As I began spraying, I immediately had an issue with the paint pot which took and hour to resolve. While I finally got the pot working correctly, it caused me to have a less than ideal finish on the area under the lower rub rail, between the water line and the rub rail. Ill have to do some paint repair in this area, but now that I know whats involved in doing that, Im not to worried about it.

Getting three coats of paint on her requires more of the elusive patience, and keeping track of where one is in regard to where one just sprayed. The first coat to hit the metal covers the primer, but not too heavy. The second coat goes on while the paint is starting to get tacky which allows the second coat to cover while not  sag. If the spray gun volume and fan width is tuned in right, the second coat is probably good enough to call the area finished. The third coat gets risky, because you now have some thickness developed and the paint wants to start sagging. The second coat needs to be well on its way to being tacky, or you could develop a sag on the third coat. You have to wait for the paint to tack up to accept more material, but you cant wait too long or it will to dry and you get dry spots where you start and stop the  spray pattern. Im using up to 10% by volume of reducer in the paint, so it tends to dry quicker. I have one spot below the bulwark at the wheel house, where I had a drying issue on the third coat and Ill have to polish it to blend it back together. This is where sanding the primer perfectly flat pays off as it makes polishing much easier.

I still have to finish paint the starboard side, so Im starting prep work on it this week. Given how busy Im getting with work, I doubt Ill have it completed by next weekend, so Im giving myself another week to call the paint work a wrap. Im big time happy to see so much shine when I walk in to the barn but Im more happy to have reached this milestone.

Cheers

Do you find information about Boden Boat Plans Australia are you looking for? If not, below may help you find more information about the Boden Boat Plans Australia. Thank you for visiting, have a great day.
Read More..

Canoe Boat Plans | Didi 950 Radius Clean Workshops

| 0 komentar |

Canoe Boat Plans


Mike Vermeersch has completed the first layer of the radius panel on one side of his Didi 950 hull. Although the surface is not up to final level, the hull shape is now much clearer.
The skin will be trimmed back to centreline when the other side is fitted.
The front face of the forward bulkhead will have a wood capping.

In theses photos the radius skin has still to be trimmed back to hull centreline. When that is done, the shape of the forefoot as it fairs into the bow will become clear.
Nice overall view of the hull shape.
Clean and powerful stern sections.
Thanks to Mike for these great photos. A few people have commented about the cleanliness of Mikes project and also of his workshop. I like to work clean on my boatbuilding projects but Mike takes it to a whole new level. That might be due to his engineering background.

The benefits of working this way are many. A very important one is that it is much easier to clean up runs and drips of excess glue etc before it cures than to do it later. If a lump or run of epoxy or resorcinol is allowed to cure, it will be stronger than the surface of the wood and will rip out pieces of wood while you remove it with a chisel. You also need to thump the head of the chisel with a mallet or at least your hand, to move it along. Expect occasional bruising of the palm of your hand in the process. You can grind or sand it off mechanically but that is always with a risk of damaging the surface and the equipment cannot generally get into tight corners. You can more easily remove it with a slightly blunt chisel or a scraper soon after it reaches initial cure, without risk of surface damage. Resorcinol is really nice in this way because it becomes rubbery and can be easily and very cleanly sliced off. Epoxy will drag on the tool and not trim off as cleanly, so the natural tendency is to leave it for later when it is hard.

The other major benefits of a clean workshop are that it is just so much nicer to work in a clean environment and you are less likely to hurt yourself by standing on odd-shaped bits of wood, slipping on wood shavings or gluing your shoes to the floor. I generally sweep the work area about every 2nd day or more often if I am doing something that produces lots of dust or waste.

Please visit our website at http://dixdesign.com/ to see our very broad range of boat designs for both amateur and professional boatbuilders.

Do you find information about Canoe Boat Plans are you looking for? If not, below may help you find more information about the Canoe Boat Plans. Thank you for visiting, have a great day.
Read More..