Tampilkan postingan dengan label radio. Tampilkan semua postingan

Plywood Boat Plans | Didi 950 Projects

| 0 komentar |

Plywood Boat Plans


There appears to be considerable interest in my posts about the boats being built to our Didi 950 design. This is a radius chine plywood design with hard chine in the topsides, designed to fit into the Classe 950 box rule. In the past few days I have received a bunch of new photos that show the build process clearly, as well as some updated progress photos.

Before going into the new photos, you might like to read the article that I posted today on my Boatbuilder Tips for Amateurs blog about how to construct building stocks or beds, the foundation off which the skeleton of a wooden boat is built. It is illustrated with photos of the Didi 950 that is being built by Fred Grimminck in Australia. The photos below are mostly of that same project, being built from scratch without a kit.

The photo below shows the various backbone components, all of which slot eggcrate-fashion into the bulkheads. The slots help to locate the bulkheads and backbones correctly relative to each other. The bow and stern have single backbone on centreline and the mid-part of the hull as two backbones that run down each side of the keel support box. The two shorter pieces on the right are the paired double-backbone parts. Next toward the left is the aft backbone, which turns up at the far end to support the transom. Extreme left is the bow backbone, which turns up at the far end to form the stem and supports a bow bulkhead into which the forward ends of the stringers are located.
Didi 950 backbone components. Click on all photos to enlarge.
The photos below show a few of the forward bulkheads with the bow backbone dry-fitted in place. The backbone has doublers just below deck level for through-bolting the bow chainplate. The doublers can be seen at the forward lower end of the backbone.
Didi 950 bow backbone and forward bulkheads
Didi 950 bulkheads and backbones
In this next photo, the transom doubler has been set up as a doubler and the stringers etc run through, then are trimmed flush. When the transom is glued over the doubler the end-grain of the longitudinals will be covered and protected. Look through the 4th cutout from left through the doubler to see how the aft end of the aft backbone turns up against the inside face of the doubler. The backbone has locating tabs that slot through the doubler, seen as light-coloured marks on centreline of the doubler. In the lower photo the transom is being glued over the outside of the doubler.
Didi 950 transom doubler
Didi 950 transom being glued over doubler.
The sheer clamps on this design sit diagonally across the corner at the intersection between hull sides and decks. They are screwed and glued to cleats on the faces of all bulkheads. In this photo the sheer clamp is clamped to those cleats. You can also see how the stringers are slotted through the bulkheads. Once the hull skin has been glued on, these junctions become very strong and rigid
Didi 950 sheer clamp
Looking forward along the hull just prior to fitting the bottom skin. The wide stringers on both sides are the tangent stringers, with doublers to back up the joint between flat bottom panels and radius skin panels at the turn of the bilge.  The single aft backbone can be seen running through to the 3rd bulkhead from the bottom of the photo. The double backbone runs forward from the 2nd bulkhead from the bottom of the photo, then changes back to a single backbone further forward, also visible.
Didi 950 bottom stringers and backbones
Stringers in the forward part of the hull, mainly showing the radius area. The two broad stringers are at the tangents, joining the flat and radiused skins together. Between them are three radius stringers, over which the double-skin radius will be formed. Below the lower of the two tangent stringers are the stringers for the side skin panels.
Didi 950 stringers
This last photo shows Mike Vermeeschs boat, being built from a kit in Ohio. Mike has the side panels all dry-fitted to check for fit ahead of gluing in place. Looks like a nice fit. The bow will be capped with solid wood, which will cover and protect the end-grain of the stringers.
Didi 950 hull side panels
Thank you to both Fred Grimminck and Mike Vermeersch for taking the trouble to send me these photos and allowing their use.

To see our other designs, please visit http://dixdesign.com/ .

Do you find information about Plywood Boat Plans are you looking for? If not, below may help you find more information about the Plywood Boat Plans. Thank you for visiting, have a great day.
Read More..

Boden Boat Plans Australia | The Star45 Model Sail Boat A radio controlled R C Sailing Model

| 0 komentar |

Boden Boat Plans Australia


The Star 45 is a 45" long hard chine hull; semi-scale model of the full-size Olympic Star. They weigh 12 pounds plus, have 12 inch beam. They are easy to scratch build and sail. Well suited for building by by the novice builder and by the skipper looking for a classic looking model to race.

Do you find information about Boden Boat Plans Australia are you looking for? If not, below may help you find more information about the Boden Boat Plans Australia. Thank you for visiting, have a great day.
Read More..

Boat Plans At Mystic Seaport | Sailing Model AMYA Star45 Class interior work radio sail controls servos mast support

| 0 komentar |

Boat Plans At Mystic Seaport


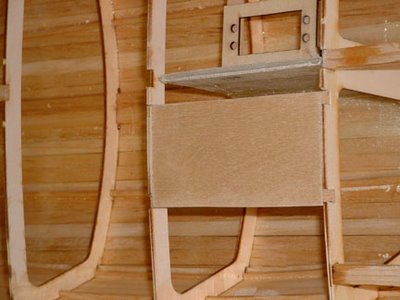
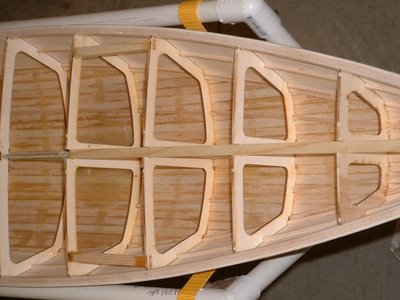
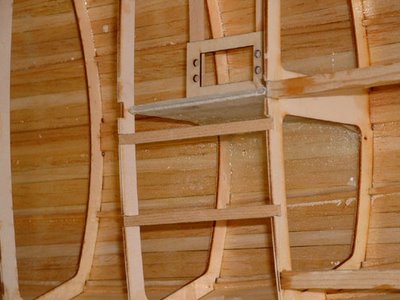
Radio Board stringers between bulkheads

(Note the method of keel support using these stringers)
radiobd_1sml.2.jpg


Radio Board
radiobd_2sml.1.jpg


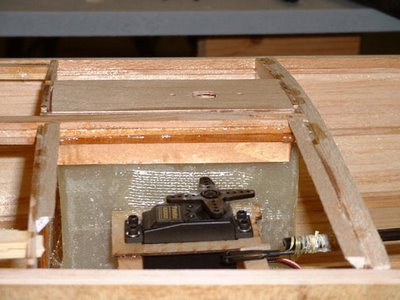
Rudder Servo
servo_sml.2.jpg


Mast support (inside hull)


internal mast support


Do you find information about Boat Plans At Mystic Seaport are you looking for? If not, below may help you find more information about the Boat Plans At Mystic Seaport. Thank you for visiting, have a great day.
Read More..

Boat Plans Aluminum | Its My Boat Radio Interview

| 0 komentar |

Boat Plans Aluminum


Its My Boat Radio is a weekly online radio program that runs on Blog Talk Radio. Hosts are Barbara Jean Walsh and Ann Avary. They do interviews with people who are experienced boaters or in the boating industry, on a broadening range of subjects.

This week I was invited to participate, on the subject of kit boats. You can listen in to the program by clicking on the link below. It is about 30 minutes and you can listen while doing other stuff. Unlike live radio, if you think that you missed something then you can go back to whatever part you missed and listen again, or go back to the start and listen to the whole program again.

Kit Boats and More! online radio program

Small selection of our plywood kit designs
Plywood kits for our designs

To see our full range of designs, go to http://dixdesign.com/

Do you find information about Boat Plans Aluminum are you looking for? If not, below may help you find more information about the Boat Plans Aluminum. Thank you for visiting, have a great day.
Read More..

Yacht Boat Plans | Didi 950 Build Bottom Skin Panels

| 0 komentar |

Yacht Boat Plans


Mike Vermeerschs amateur boatbuilding project of a Didi 950 is moving on to the next stage, with bottom panels fitted and work starting on the side panels. Mike is building from a plywood kit that we supplied to him and reports that the fit is good. The kit has jigsaw joints on all large panels, making them easy to assemble either on the floor or on the boat.
Didi 950 with all stringers installed.
Two of the stringers each side, at the junctions between flat and radiused skin areas, have plywood doublers attached to serve as backing pads to the joint. I call these the tangent stringers. The doubler on the upper tangent stringer is in process of being fitted and can be seen running forward from the transom through to the third bulkhead from aft.

In the photo below, the transom has been fitted, followed by the bottom panels. These panels each have two transverse jigsaw joints and join each other at a centreline butt joint over the plywood backbone. In the photo the jigsaw joints have temporary battens over them to secure them while the glue is setting.
Bottom panels fitted.
Mike has also started to dry-fit the side panels ahead of gluing in place. At the right of the photo the forward lower panel can be seen and which will continue through to the transom. The lower edge, as seen upside-down like this, forms one half of the chine. The other half of the chine will be formed by the upper side panel.

Today Mikes 300lb brother decided to test the hull stiffness of this partially-built Didi 950 . He climbed onto the bottom of the boat and jumped on the bottom panels. They passed his improvised test but I think that I would have recommended that he wait until the whole hull was skinned before doing such a test.
Mikes 300lb brother tests the Didi 950 hull stiffness.
The broad stringer that shows on this photo is the upper tangent that will join the lower side panel to the radius.

To see our other designs, visit http://dixdesign.com/ .


Do you find information about Yacht Boat Plans are you looking for? If not, below may help you find more information about the Yacht Boat Plans. Thank you for visiting, have a great day.
Read More..